![]() Home
Home
![]() The Alliance
The Alliance
![]() Exhibits
Exhibits
![]() Gallery
Gallery
![]() Resources
Resources
![]() Calendar
Calendar
![]() Competitive Exhibits
Competitive Exhibits
![]() Advocacy
Advocacy
![]()
![]() Technical Articles
Technical Articles
![]() Supplies
Supplies
![]() Links
Links
![]() Library
Library
Stenocuts & Erasercuts
by Mick Mather
|
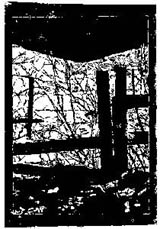
I've been using the term "erasercut" for about six years and it is the term used in the Eraser Carver's Quarterly, which I edit. Erasercuts designate, in my definition (and I'm trying to enter the term into the printmaking lexicon), "relief prints from carved blocks of any of the variety of erasers (rubber, gum or plastic) and other commercially-produced soft rubber, gum or vinyl materials." Sue Anne Bottomley's "stenocuts" are relief prints from such a material, so the more general term would be "erasercuts." This material does carve like butter and also will hold a clean, crisp line over a fair distance. The three "rubber stamp" images (pretzel, cupcakes and carrots) were all newsprint rubbings that the material also takes very well. I rubbed the back of the paper, face-down on the material, with a paperclip and carved with a V-bit linoleum-cutting tool. A photocopy for Midnight in a Camden Field was first transferred to the "stenocut" plate using a cloth saturated with acetone-based nail polish remover, but it didn't work. I haven't tried the oil of wintergreen method and can't say whether my problem was the copy, the solvent, the plate or some combination. So I made a pencil sketch of the photocopy instead, which the "stenocut" accepted well by placing the sketch face down and carefully rubbing with a large paper clip. This first proof was done with water-based inks that worked just fine. I found that the "stenocut" seems to have a static charge that makes removal of the tiny bits, flakes, strips and crumbs of paper a pain. Remedy: try cellophane tape to remove stubborn pieces. Since the material can be embossed, care must be taken not to ding or dent the material in areas that you want to print later. Very shallow cuts do fill with ink, so special care should be taken in such areas. Distant Hills was created with a line pattern of unwaxed dental floss. A combination of removable glue stick (to coat the entire foam core surface) and white glue (draw unwaxed floss through a puddle of it and draw through fingers to get rid of the excess) was used to lay the floss in one place on a piece of foam core long enough to lay the "stenocut" material on top. Many different images can be printed, depending on inking, pressure and type of ink pad used (even printing a "ghost," the second print without re-inking). All in all, my experience with this material has been a positive one. One important caution: the sample "stenocut" material with paper backing that I received was a disappointment. I don't know whether the samples were old or subjected to extremes of heat and cold or what, but the paper backing simply would not come off. Before investing in a roll-sized order of this material, I recommend that you make sure you're purchasing stock backed with plastic or plastic-like material. I mounted my material on 3/8" foam core before cutting. The stamps were carved without removing the backing or mounting, but when finished, I did mount them on a wood block. Okay? Now you try it! Mick Mather can be reached at PO Box 222, Clay, NY 13041-0222 |
 pretzel
 cupcakes
 carrot
© Mick Mather Distant Hills
 © Mick Mather Midnight in a Camden Field
|
