|
Materials:
- Oil-based etching/litho inks
- Transparent base or tint base extender
- Burnt plate oil, #00
- Three sheets of good quality rag paper, torn to the same dimensions
- Acrylic (Plexiglas, Lexan, etc., with edges filed), acetate or mylar, cut a bit larger than the printing paper by at least 1" all around
- Mat board, some cut roughly into 2" x 3" strips, other pieces in various shapes (triangles, etc.)
- Paintbrushes, rags, anything that can be used for drawing through the ink
- Large rollers and hand brayers
- Plenty of newsprint
- Permanent laundry marker
Method:
This process will yield three very similar monotypes from a single session of work upon the matrix. One of the prints will be a mirror image of the other two.
- Decide upon the size of the final image and tear paper to size. Your matrix, whether plexi, acetate or mylar, should be an inch or more larger than your paper all around. We'll be using an etching press, so be sure to file the plexi to avoid cutting your blankets.
- Set the pressure on the press by running your plexi through, covered with a bigger sheet of newsprint. Try to achieve a slight embossing of the newsprint (light pressure).
- Affix a sketch or photocopy to the underside (inkless side) of the plexi, or draw directly on the plexi with your marker. This will be your guide for drawing.
- Make center registration marks on the back of the printing paper (with pencil) and the underside of the plexi (with marker) using the "T-Bar" method.
- Lay out a quantity of transparent base, and add a small bit of color. Loosen up the ink with burnt plate oil, to the consistency of cake icing, soft margarine or Cheese Whiz ... nice and smooth. Always add ink to base (not base to ink) and go slowly: 90% base will still allow for a vibrant color. Do draw-downs and label them clearly.
- Roll the ink out on the slab until roller marks can no longer be seen, then roll up the plexi fairly heavily. To completely avoid edge and lap marks from the roller on the plexi, use the correct size roller (one that is longer than your plexi and a large enough diameter so as not to lap itself when rolling). You should be able to see your guide through the layer of ink.
- Draw in a reductive manner with the bits of mat board, both ends of a brush, etc. Whatever areas are removed will either be the white of the paper in the final print or hold information from the successive runs.
- Position the paper (sheet A) using your registration guides, cover with newsprint, and run it through the press with relatively light pressure. Without disturbing the paper's position on the plexi, check the corner of the print. If needed, increase the pressure and run it back through, but try to avoid removing too much ink. With practice, a nice balance can be found between the amount of ink rolled out, the pressure of the press, and the ink deposited on the paper.
- Carefully remove the print from the plexi. Position the second sheet (B) of paper on the plexi, place the first print (A) on top (image-side up), and the third sheet (C) over that. Try to line them all up, edge for edge. Place newsprint over all.
- Increase the pressure a bit and run them all through the press. Check the prints as before, and adjust the pressure if necessary. This process has the dual benefit of creating two ghost prints as well as stripping excess ink off the paper, which lightens up the image nicely.
- Repeat steps 5 - 7 with the next color.
- Place the SECOND sheet (B) of printing paper down, and proceed with steps 8 - 10, with the following exceptions. You will use the sheet that was printed first (A) to print the ghost image of this second color. Place sheet B, image-side up, on top of A, then C onto B to strip it.
- Continue in this manner, alternating between sheets A and B for the first runs. Sheet A would be used for the third color, B for the ghost. B would get the first run of the fourth color, A the ghost, and so on. Sheet C will always be used to strip the prints and will yield a mirror image of the other two sheets.
Try using stencils, textured fabrics, any soft material that can be safely run through the press. Additive mwthods also work well. Textures can be created in the ink by blotting it with a cloth, aluminum foil, etc. Spraying or splashing solvents onto the rolled out ink will give interesting effects as well.
Another version of this process involves the use of screenprinted information on one of the sheets. Try screenprinting an image in a light color with acrylic screen ink onto sheet A. Proceed with steps 8 - 10. You'll find that wherever the etching ink sits on top of the acrylic on sheet A, a slightly darker image appears on sheet C. This is because less etching ink is absorbed by the paper in the screenprinted areas of A, and therefore more is striped off onto C. Sheet B will also receive a ghost image of the screenprint when it is used to pull the ghost after A's run. This process seems to work best if A and B are not alternated during runs of successive colors, and C is used to strip A only. The prints are less similar, but as the etching ink builds up and is stripped off of the screenprinted areas of sheet A, very interesting affects are achieved. Most, but not all, of the ink is transferred from the screened area during stripping. Eventually the acrylic areas develop a unique quality from the residue of the various colors of etching ink. If an image is screened onto both A and B with exact placement, steps 8 - 13 can be followed.
Bill Fisher can be reached by e-mail at: wwfisher@charter.net
|

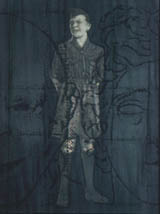
William Fisher
Dissertation Physique, © 1995.
Monotype and screenprint
30" x 22"
variant edition of 3.

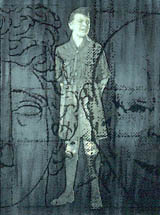
William Fisher
Dissertation Physique, © 1995.
Monotype and screenprint
30" x 22"
variant edition of 3.

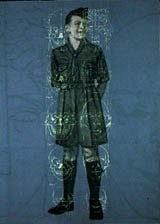
William Fisher
Dissertation Physique II, © 1995.
Monotype and screenprint
30" x 22"
variant edition of 3.
|
![]() Home
Home![]() The Alliance
The Alliance![]() Exhibits
Exhibits![]() Gallery
Gallery![]() Resources
Resources![]() Calendar
Calendar![]() Competitive Exhibits
Competitive Exhibits![]() Advocacy
Advocacy![]()
![]() Technical Articles
Technical Articles![]() Supplies
Supplies![]() Links
Links![]() Library
Library


